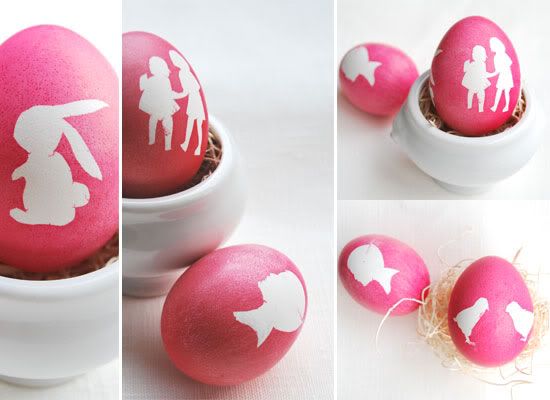
Silhouette Easter Eggs
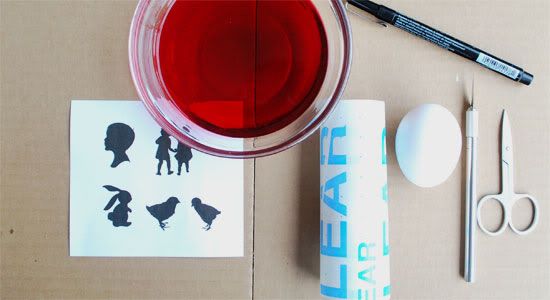
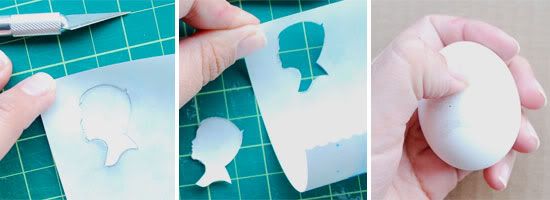

Start by tracing the silhouettes on the contact paper. Once you have all the silhouettes traced, start cutting their outlines with x-acto knife or scissors. Next, pill off the back and stick the silhouette on the egg. Burnish the outside edges with your thumb. This will keep the dye from penetrating – resulting in a sharp silhouette.
(tip: I find warm eggs work best with the stickers)
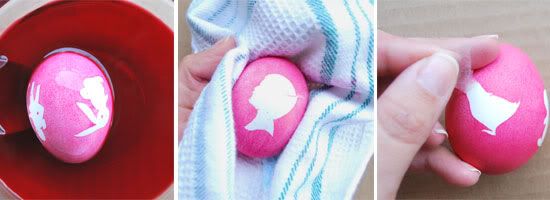
Once you’re done sticking all the silhouettes on the eggs, start immersing them in the dye. Allow them to sit for about 2-5 minutes until you get a nice saturated color. Remove the egg from the dye and pat it dry with a paper towel. Start to pill the stickers and violá! You just made silhouette Easter eggs!

The post Silhouette Easter Eggs appeared first on Le Papier Blog.