DIY Tutorial – Silhouette Ornaments
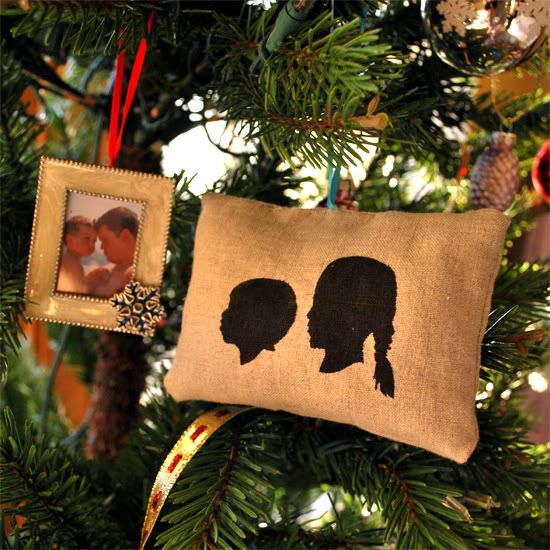
Today, I’d like to share with you a fun and easy tutorial, Silhouette Ornament using just a few tools found around the house! These make perfect little gifts to give during the holidays. Or, stuff them with your favorite bath salts and turn them into sachets. You will love looking at those adorable silhouettes each time you use them!
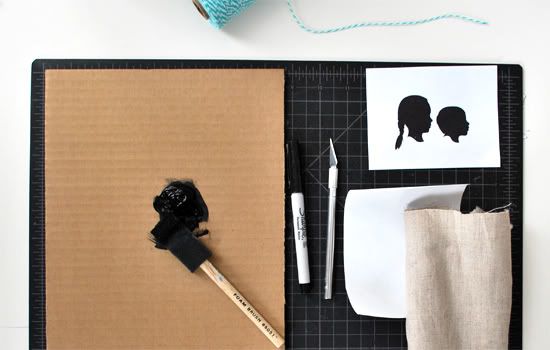
Tools you will need:
Silhouettes (printed on plain paper)
Thin marker
X-Acto knife
Freezer paper
Fabric paint
Brush
Fabric ( I am using a 6×9 inches linen remnant)
Iron
Sewing machine
Ribbon for hanging
Directions:
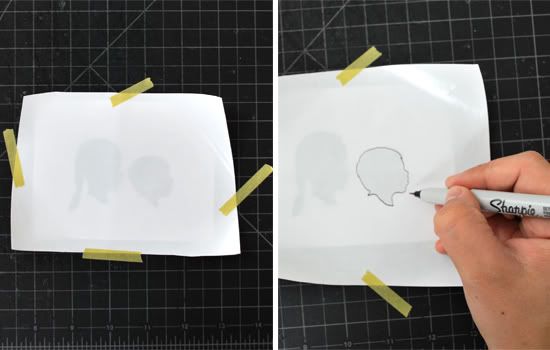
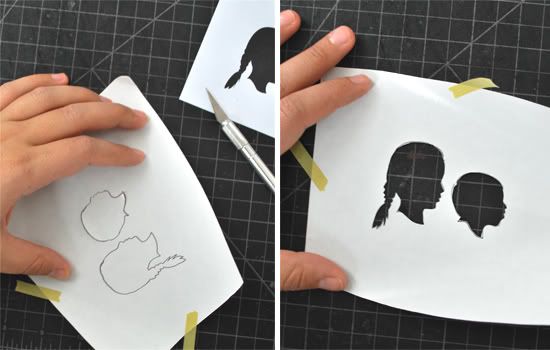
Start by tracing the silhouettes on the freezer paper. Once you’re done tracing them, start cutting their outlines with an x-acto knife.
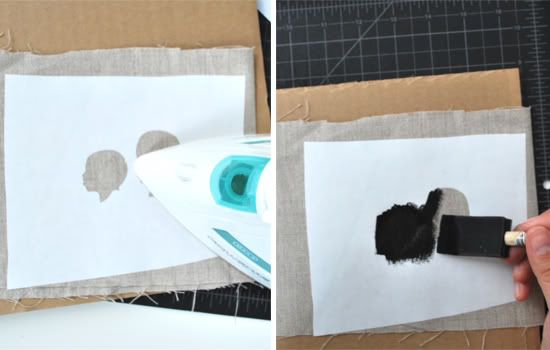
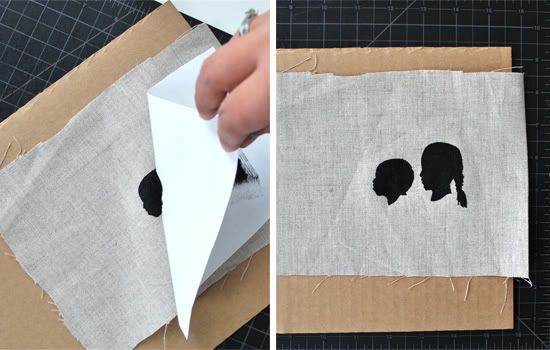
Next, iron the freezer paper on to the fabric making sure the edges of the silhouettes are completely sealed. This will keep thepaint from penetrating – resulting in a sharp silhouette. Start applying paint over the silhouette cut outs. Gently pill off the freezer paper and touch up any spots that you missed with a tiny paint brush (I like to add flyaway hairs and other details to make the silhouettes more recognizable).
Next you can sew the fabric into a little square, rectangle of any shape you like making a cushion out of it. Stuff it with poly fill or your favorite bath salt. Wasn’t that easy?
I have to admit, freezer paper is one of my favorite crafting tools. It is so versatile and so easy to use. What are you crafting this holiday season? I’d love to know. Leave a link on the comment area below!