DIY Mother’s Day Silhouette Card
Mother’s Day is this weekend! Did it sneak up on you guys too? To help you prepare for mom’s special day in Le Papier Studio fashion, we’re sharing a simple tutorial for your very own customized and handmade DIY silhouette card. Sometimes we spend so much time focused on the gift itself when a thoughtful card could be the perfect finishing touch – Heck, she may even prefer your heartfelt words over new pjs or flowers. It’s the little things…

Supplies:
-
Cardstock
- Pencil
- Sharpie marker
- Watercolors
- Family photo (printed as a low quality quick draft so that you don’t waste printer ink!)
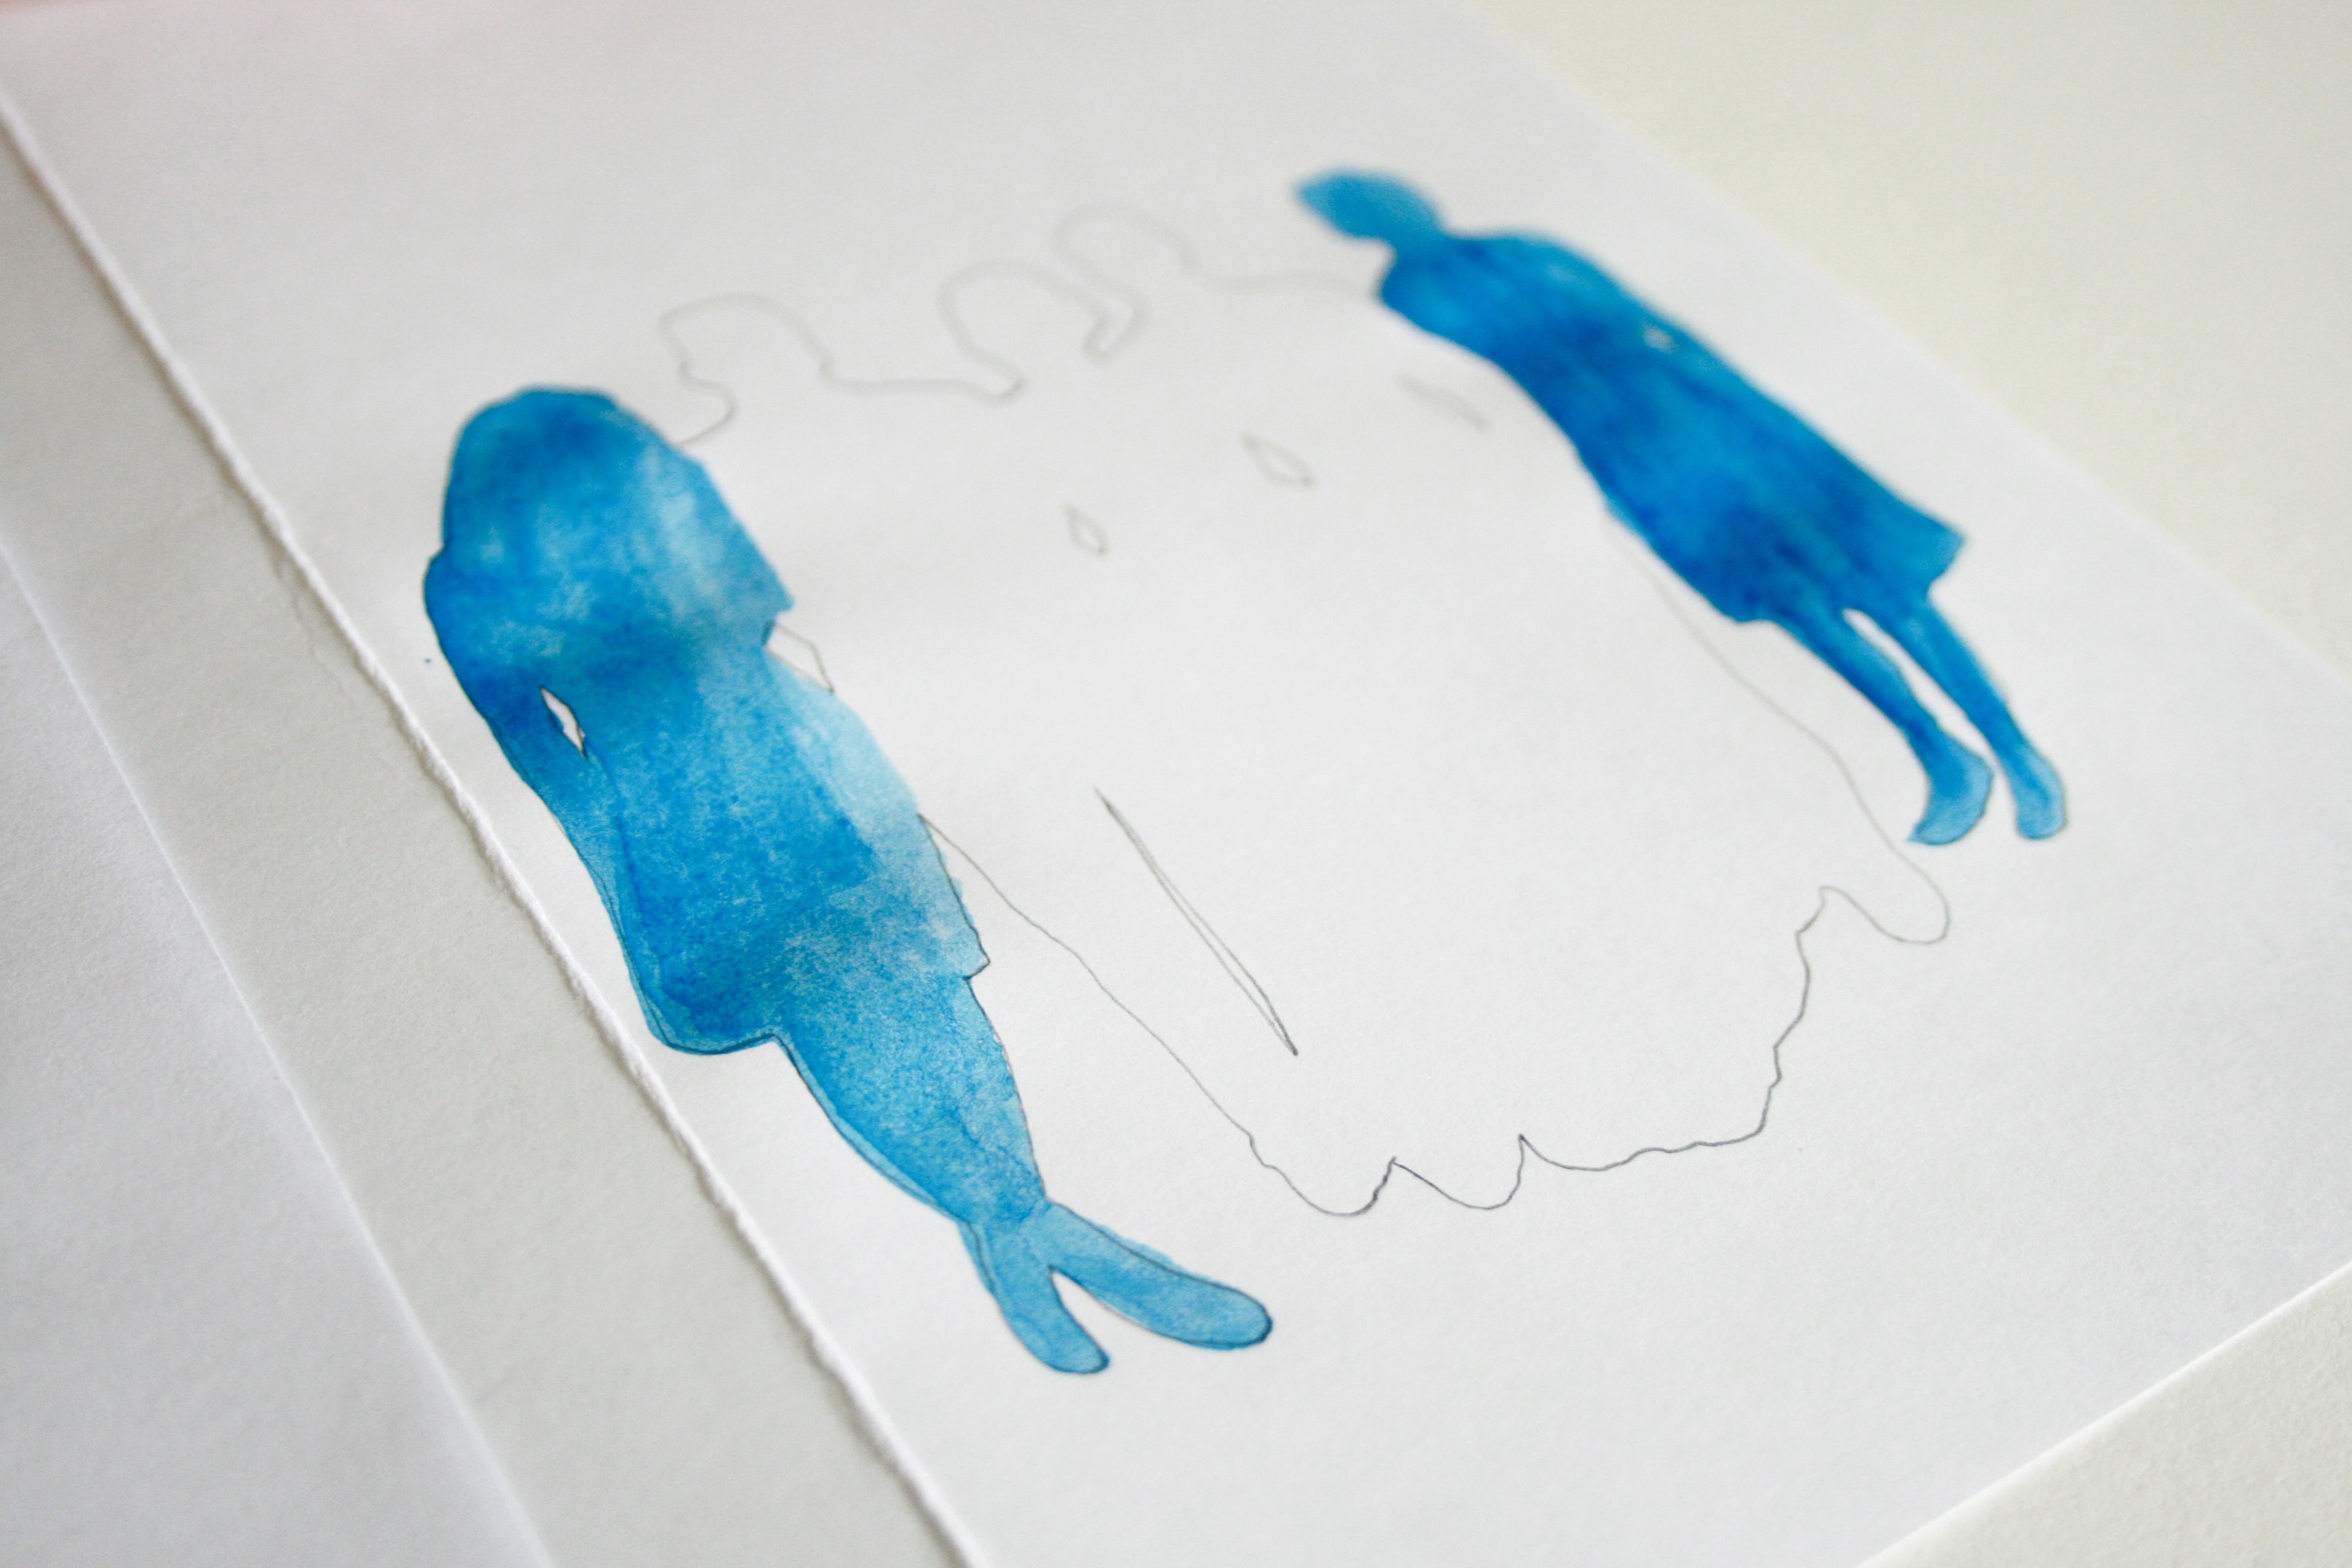
Begin by tracing the outlines of your family members on the printed photo with a Sharpie marker. Once complete, layer the cardstock on top of the photo and use a light table (or hold your photo up to a window like I did) to trace the outline of the silhouettes with a pencil. The thick Sharpie lines drawn on beforehand will help to make the silhouettes stand out during this step.


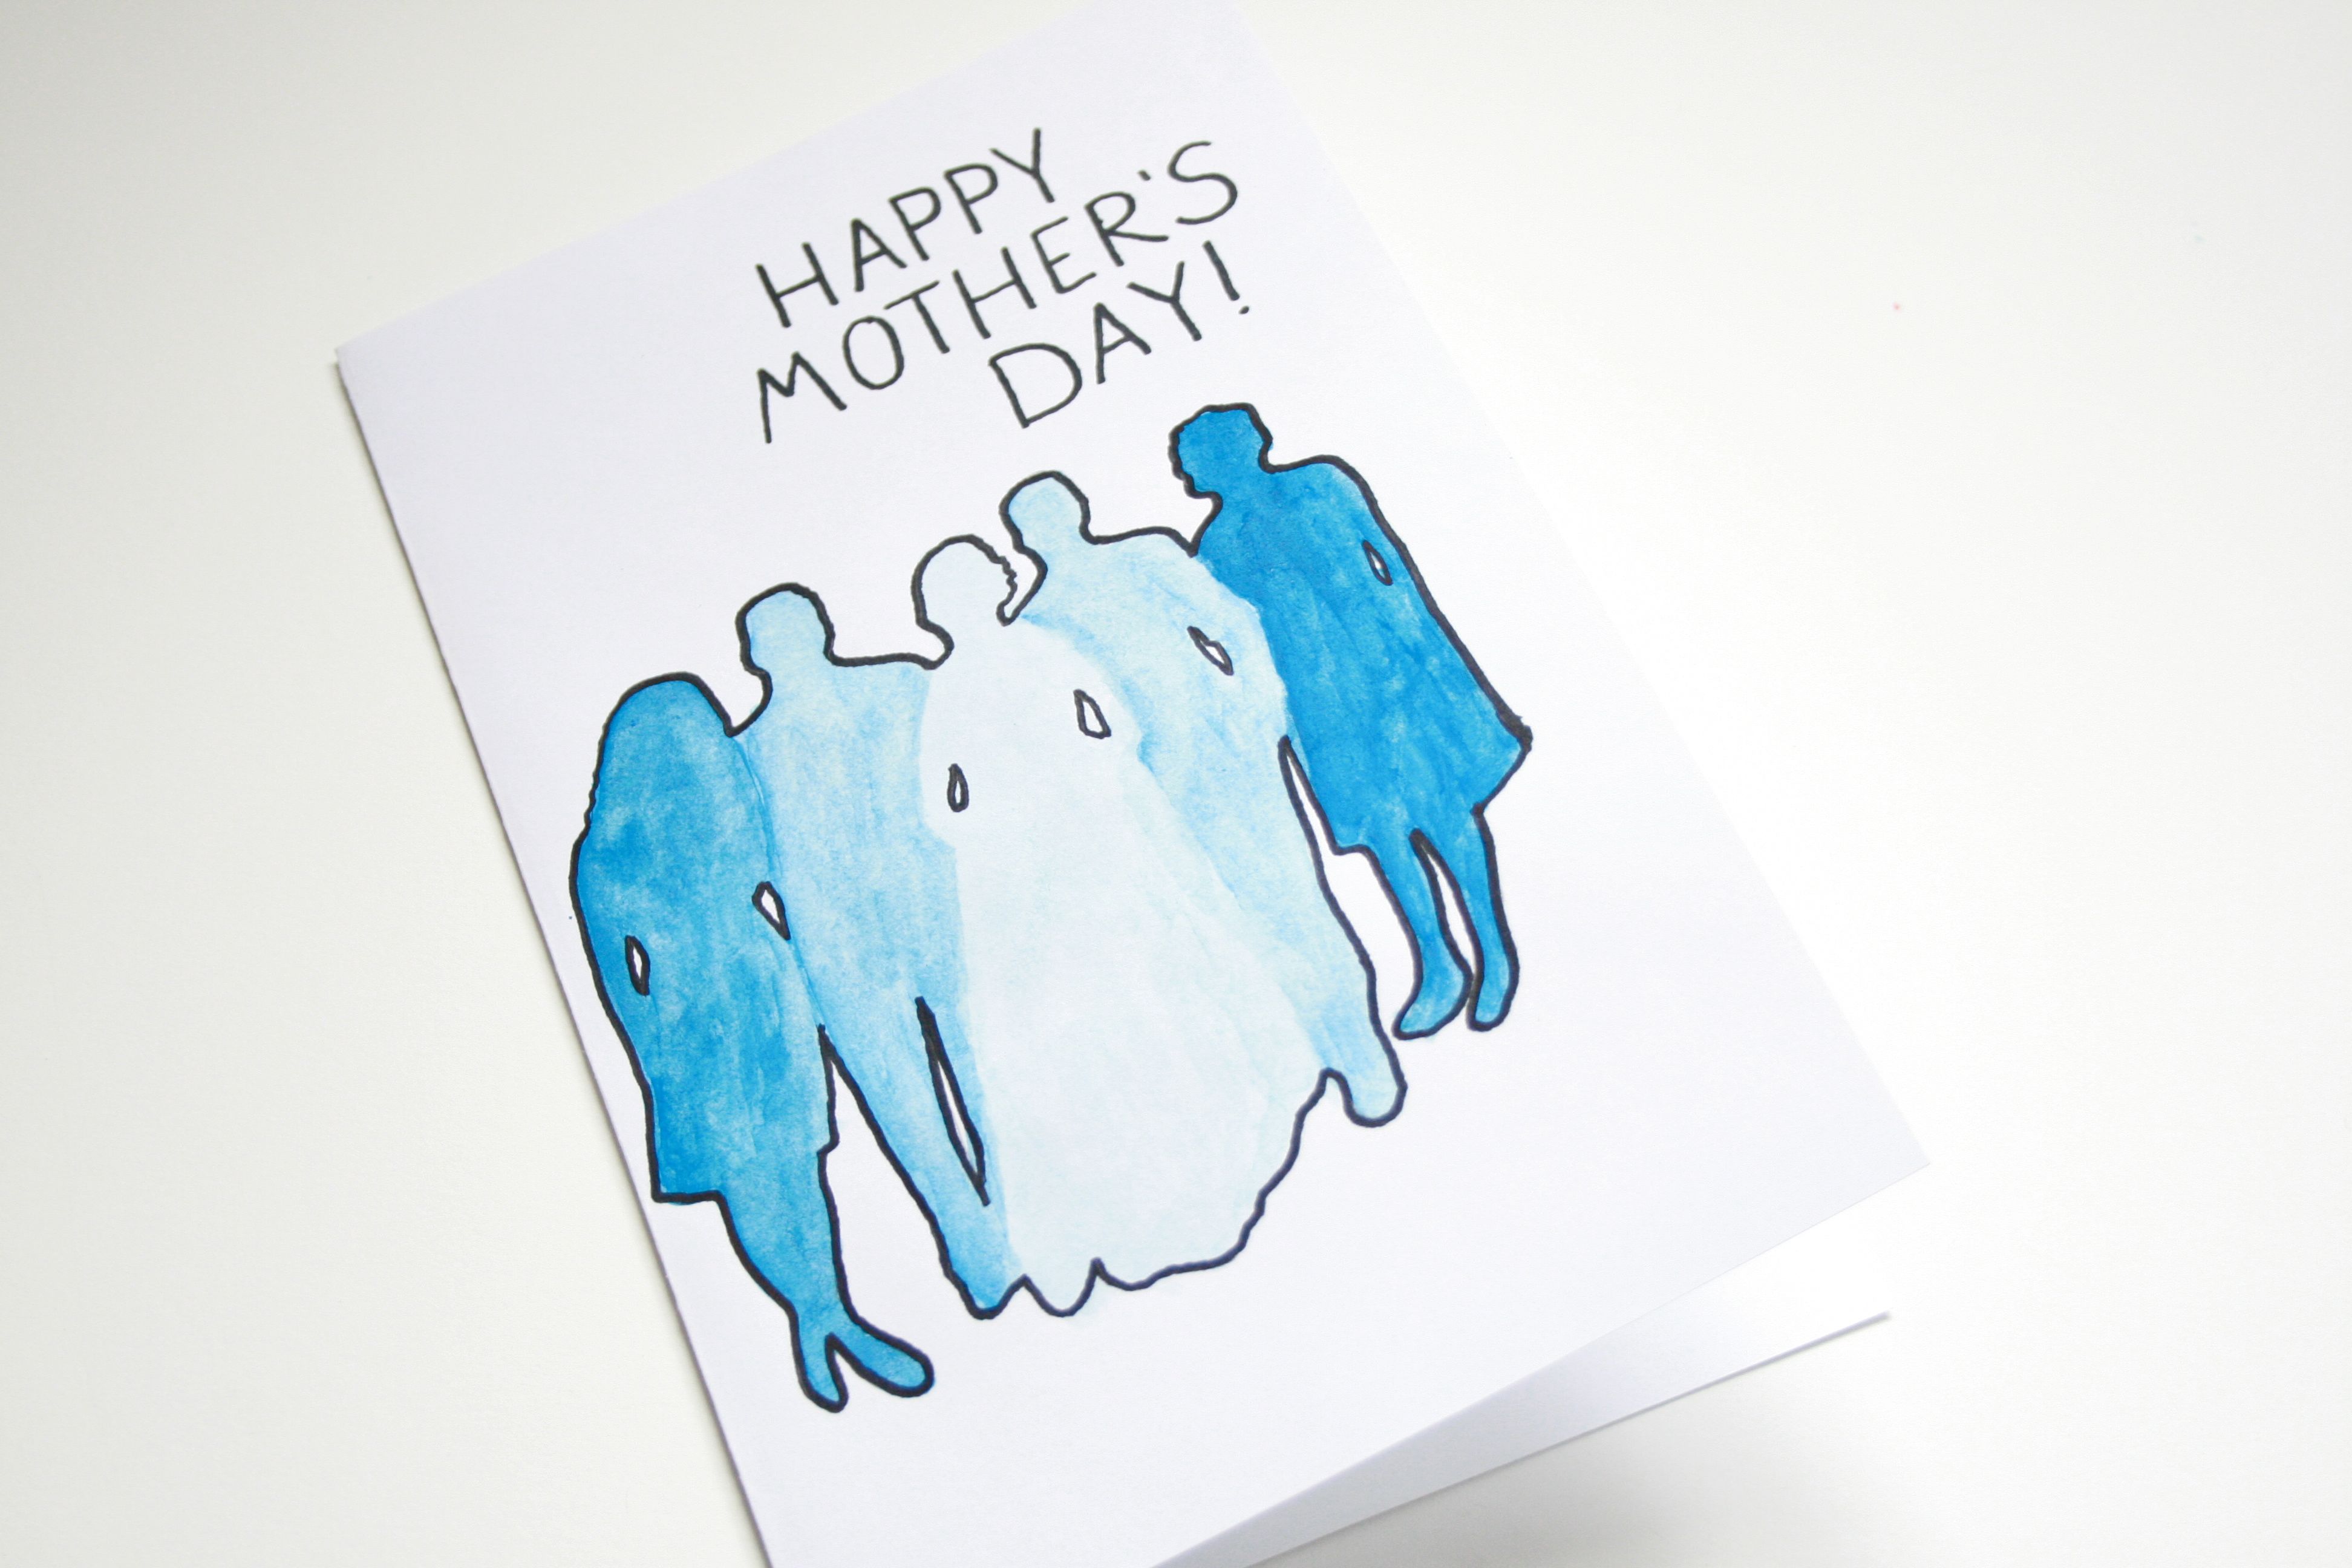
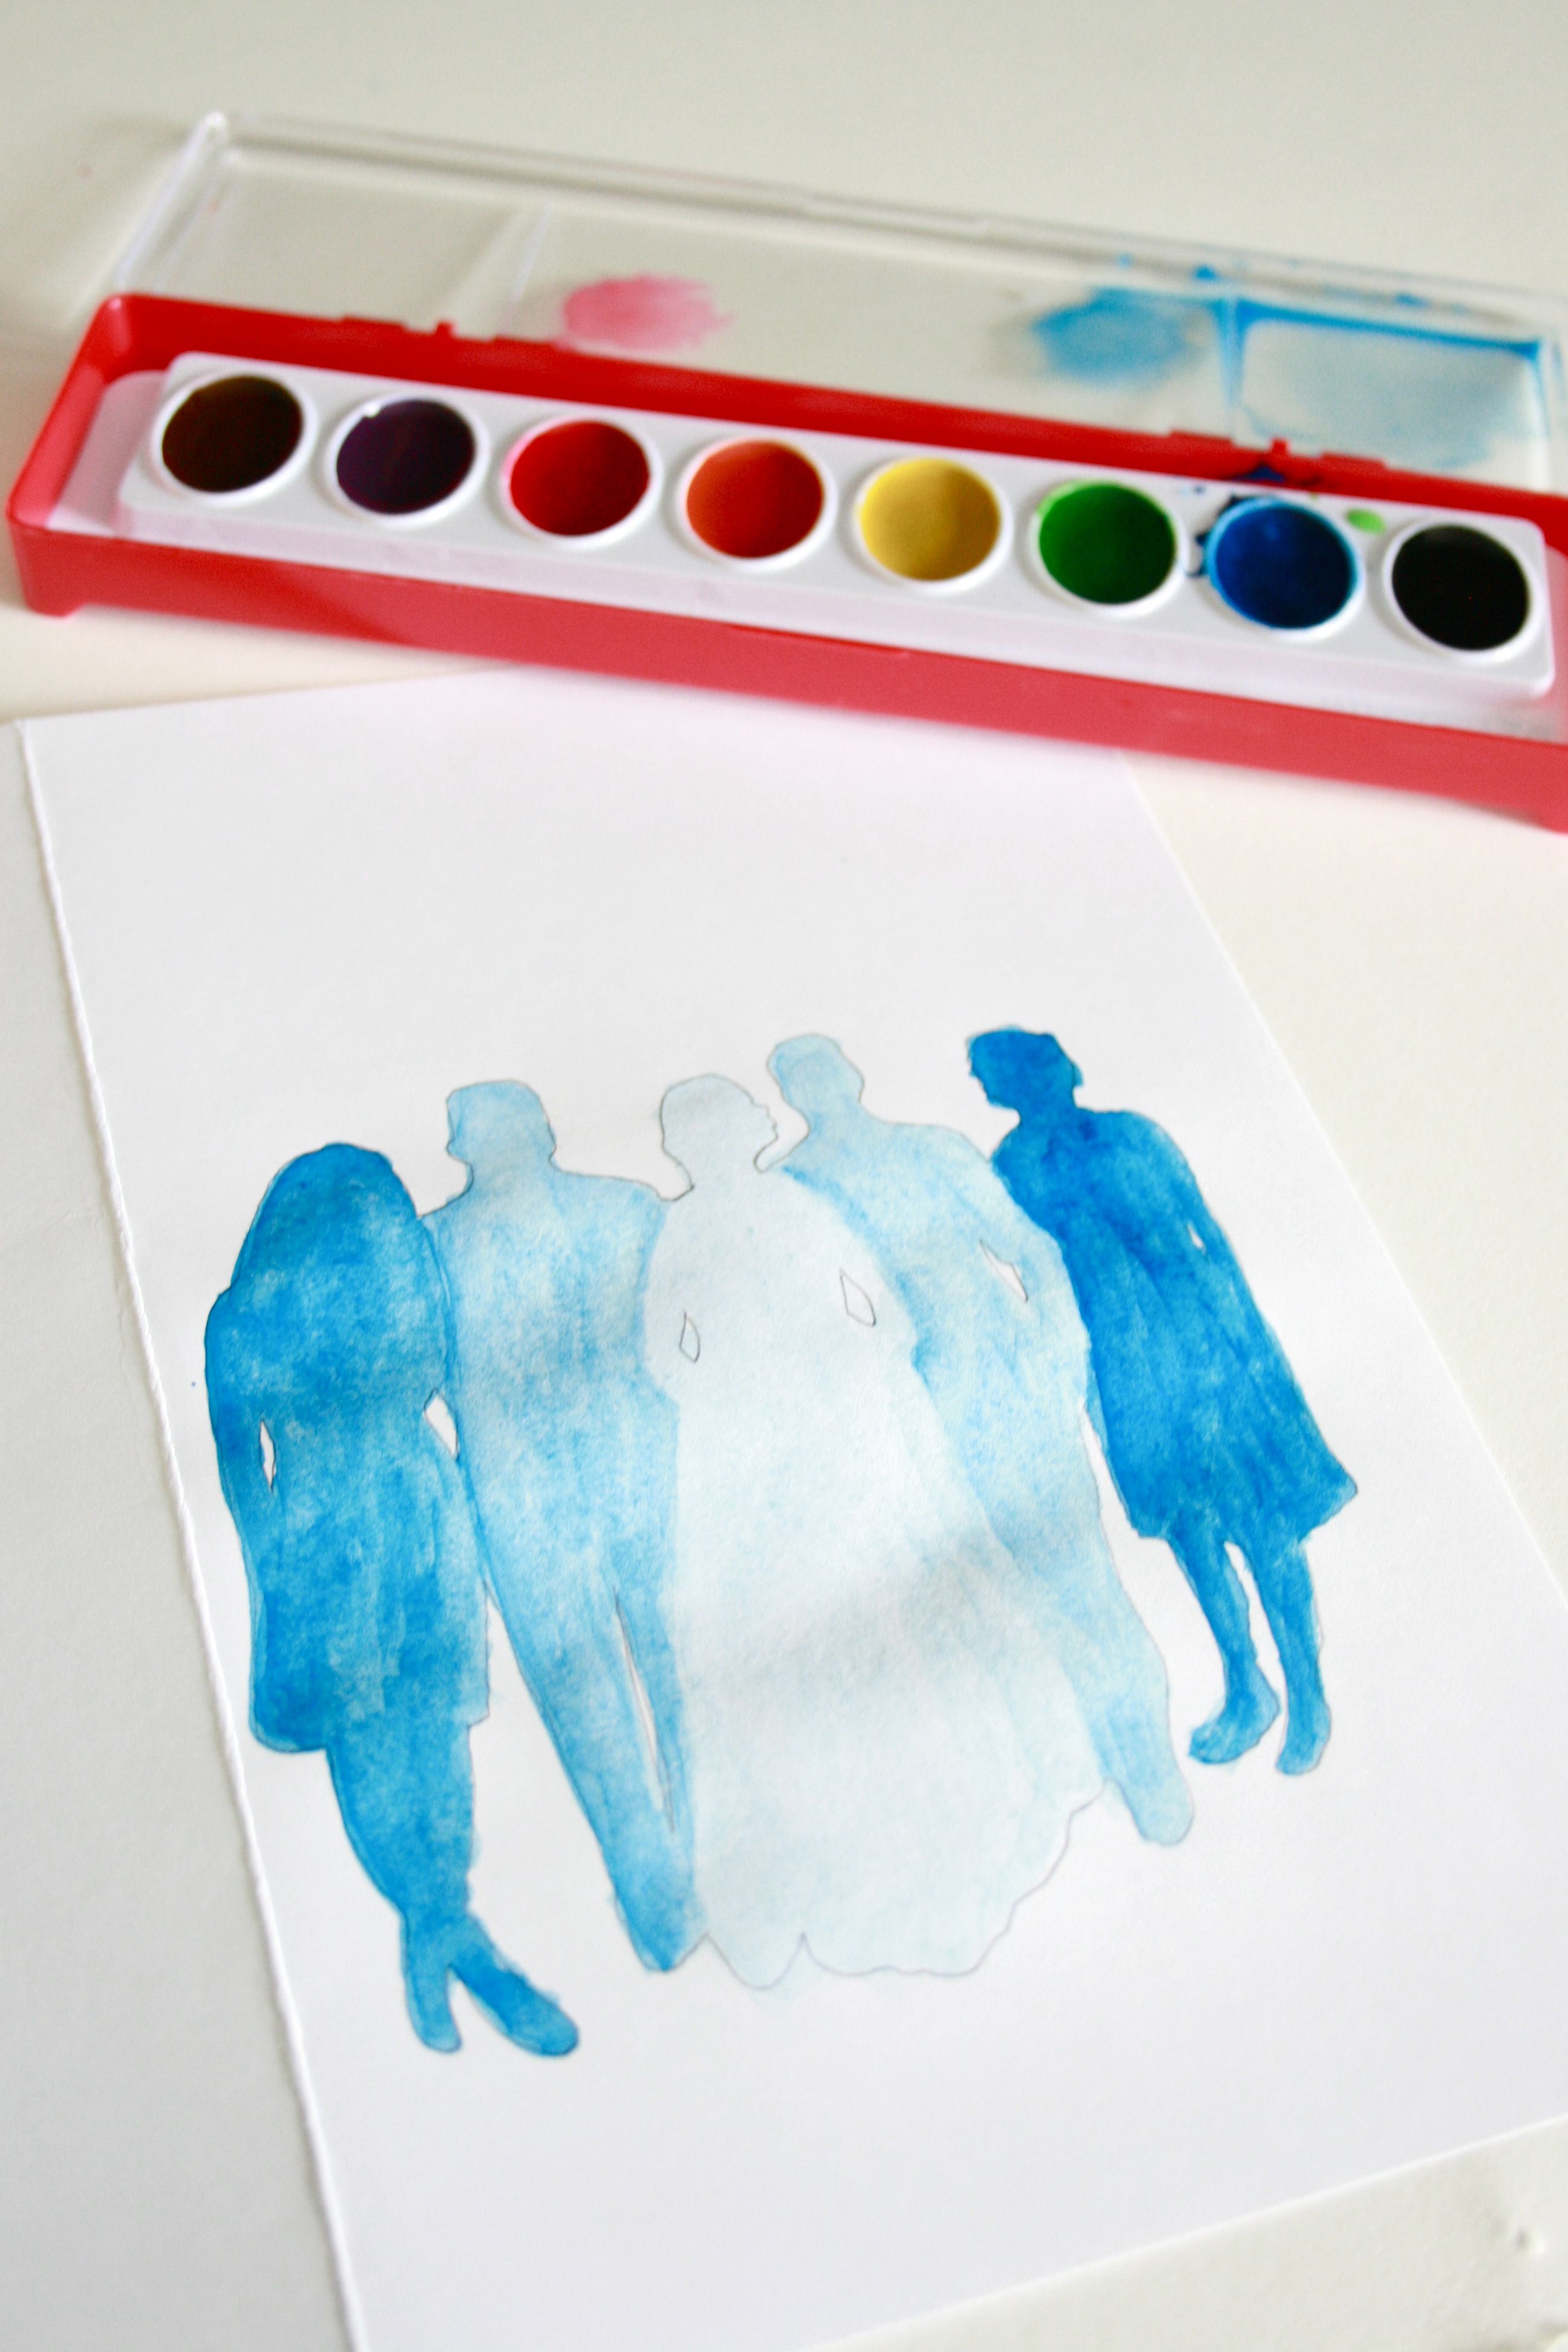
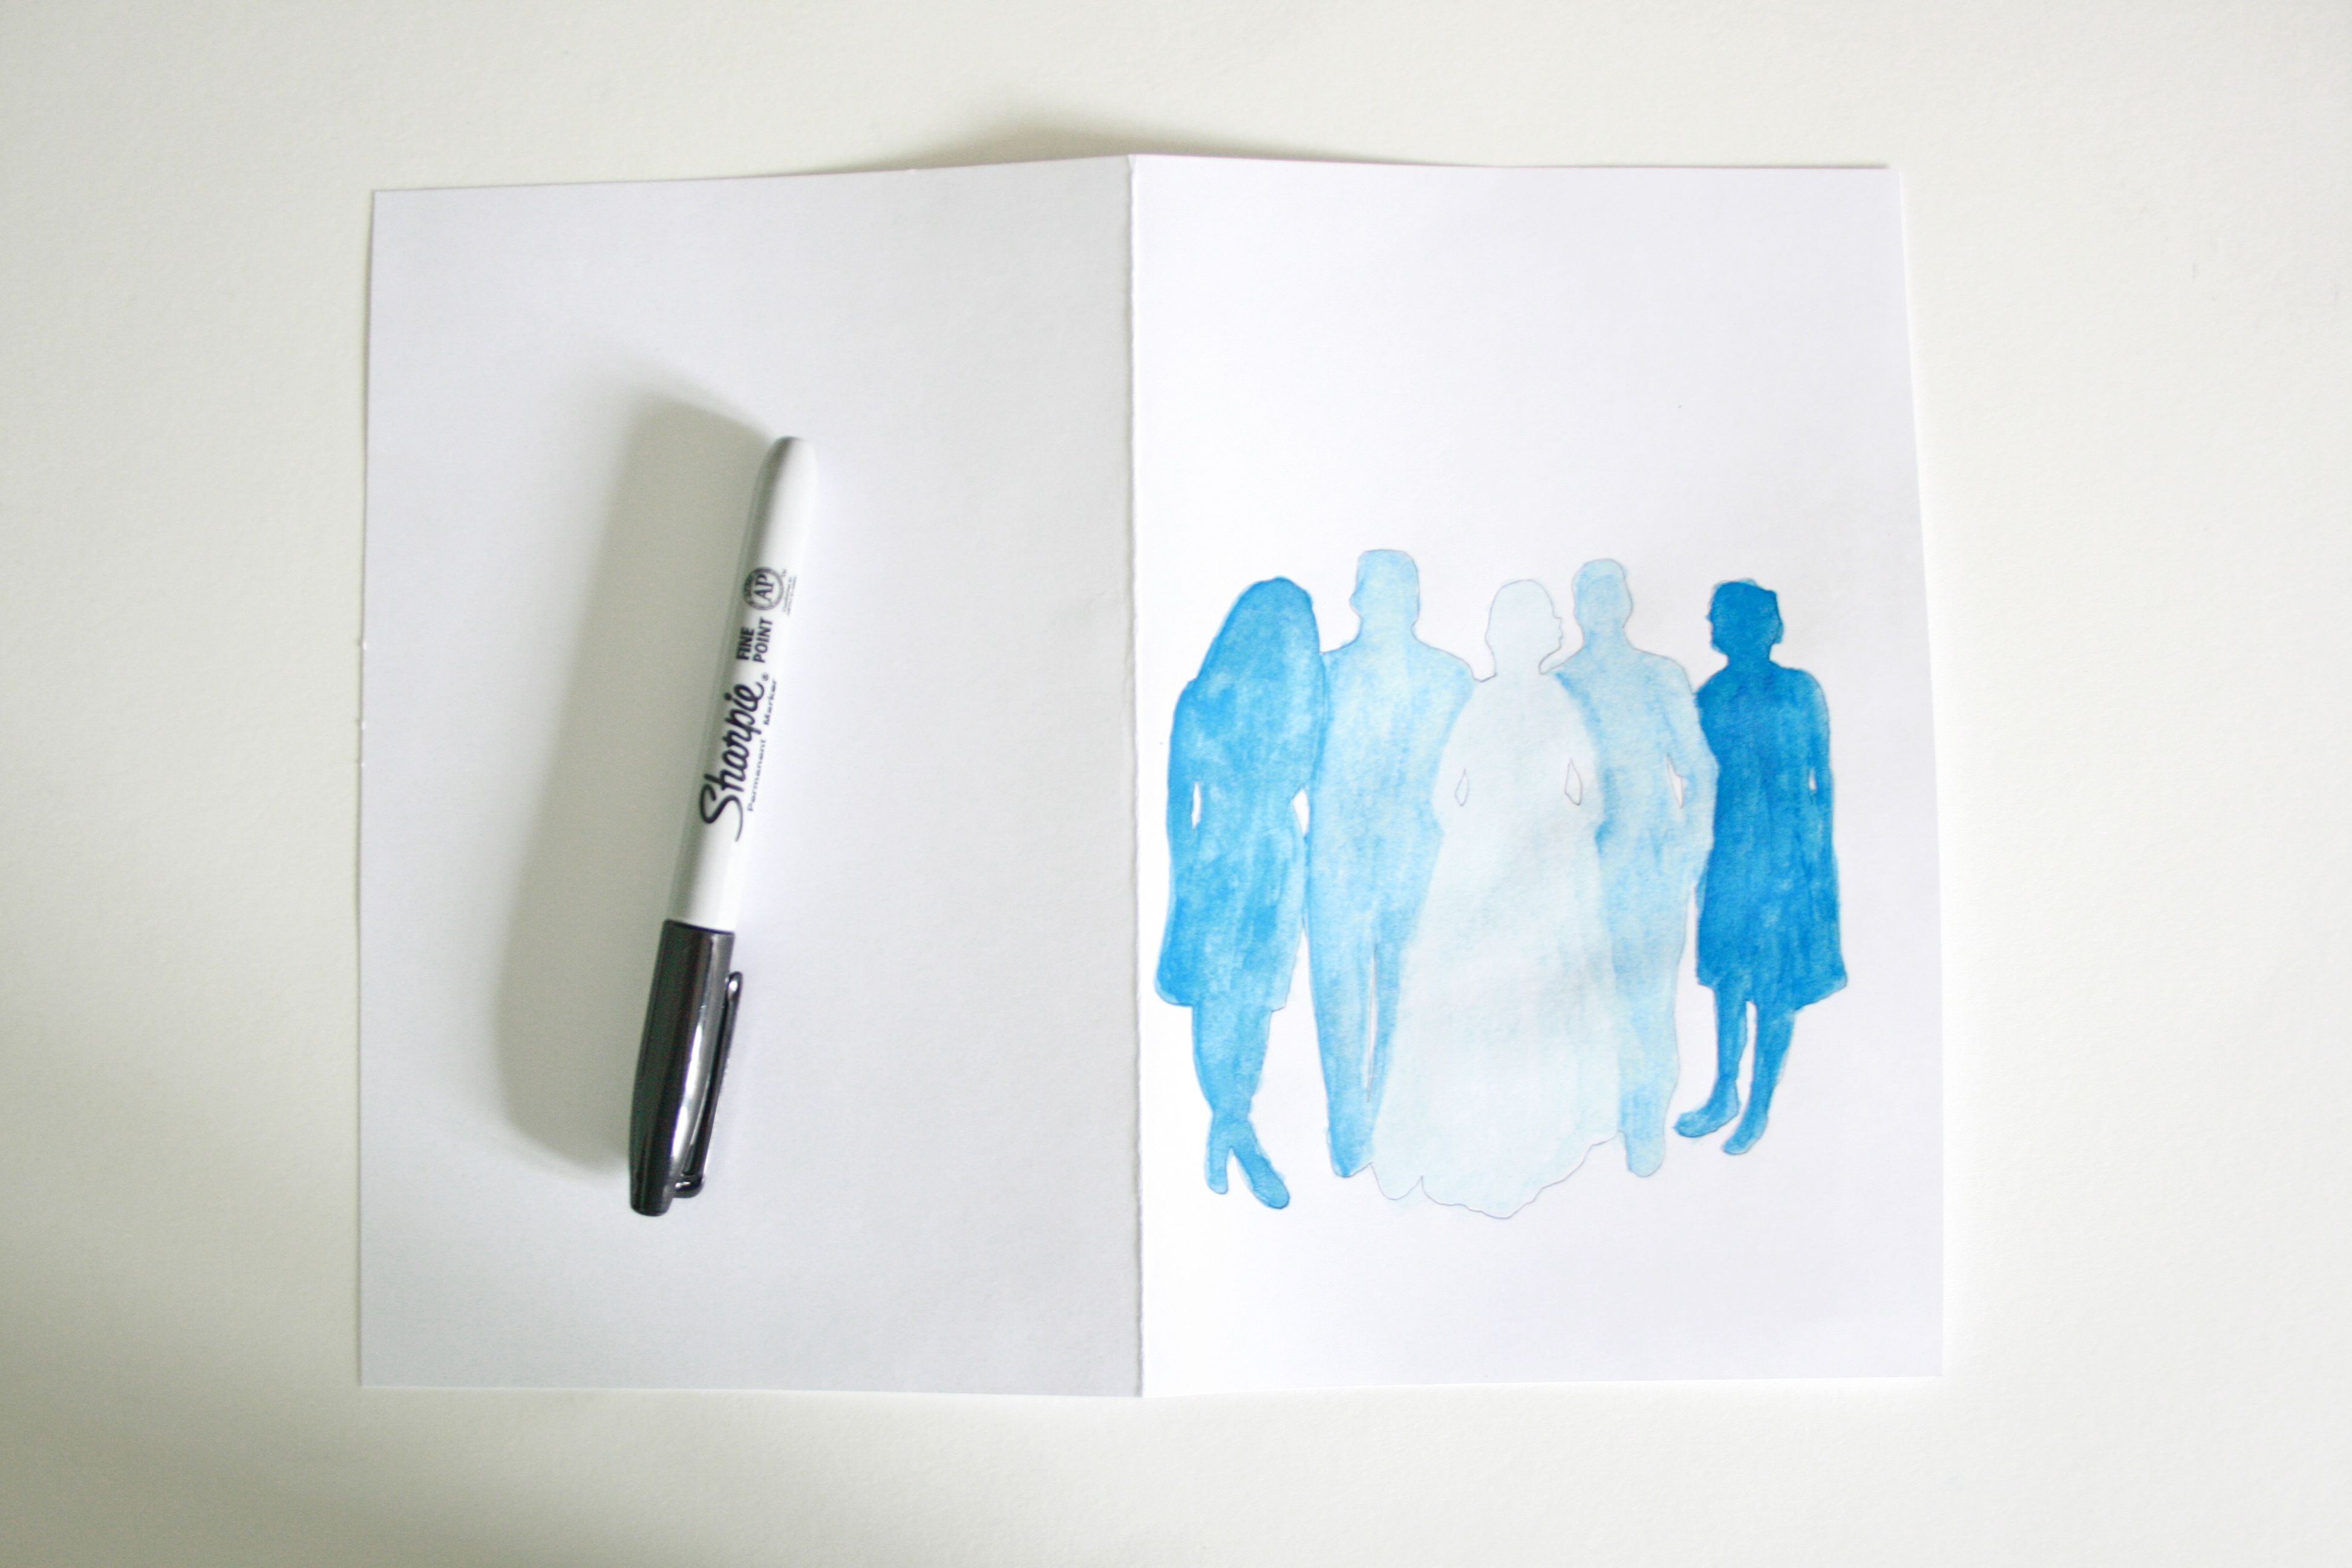
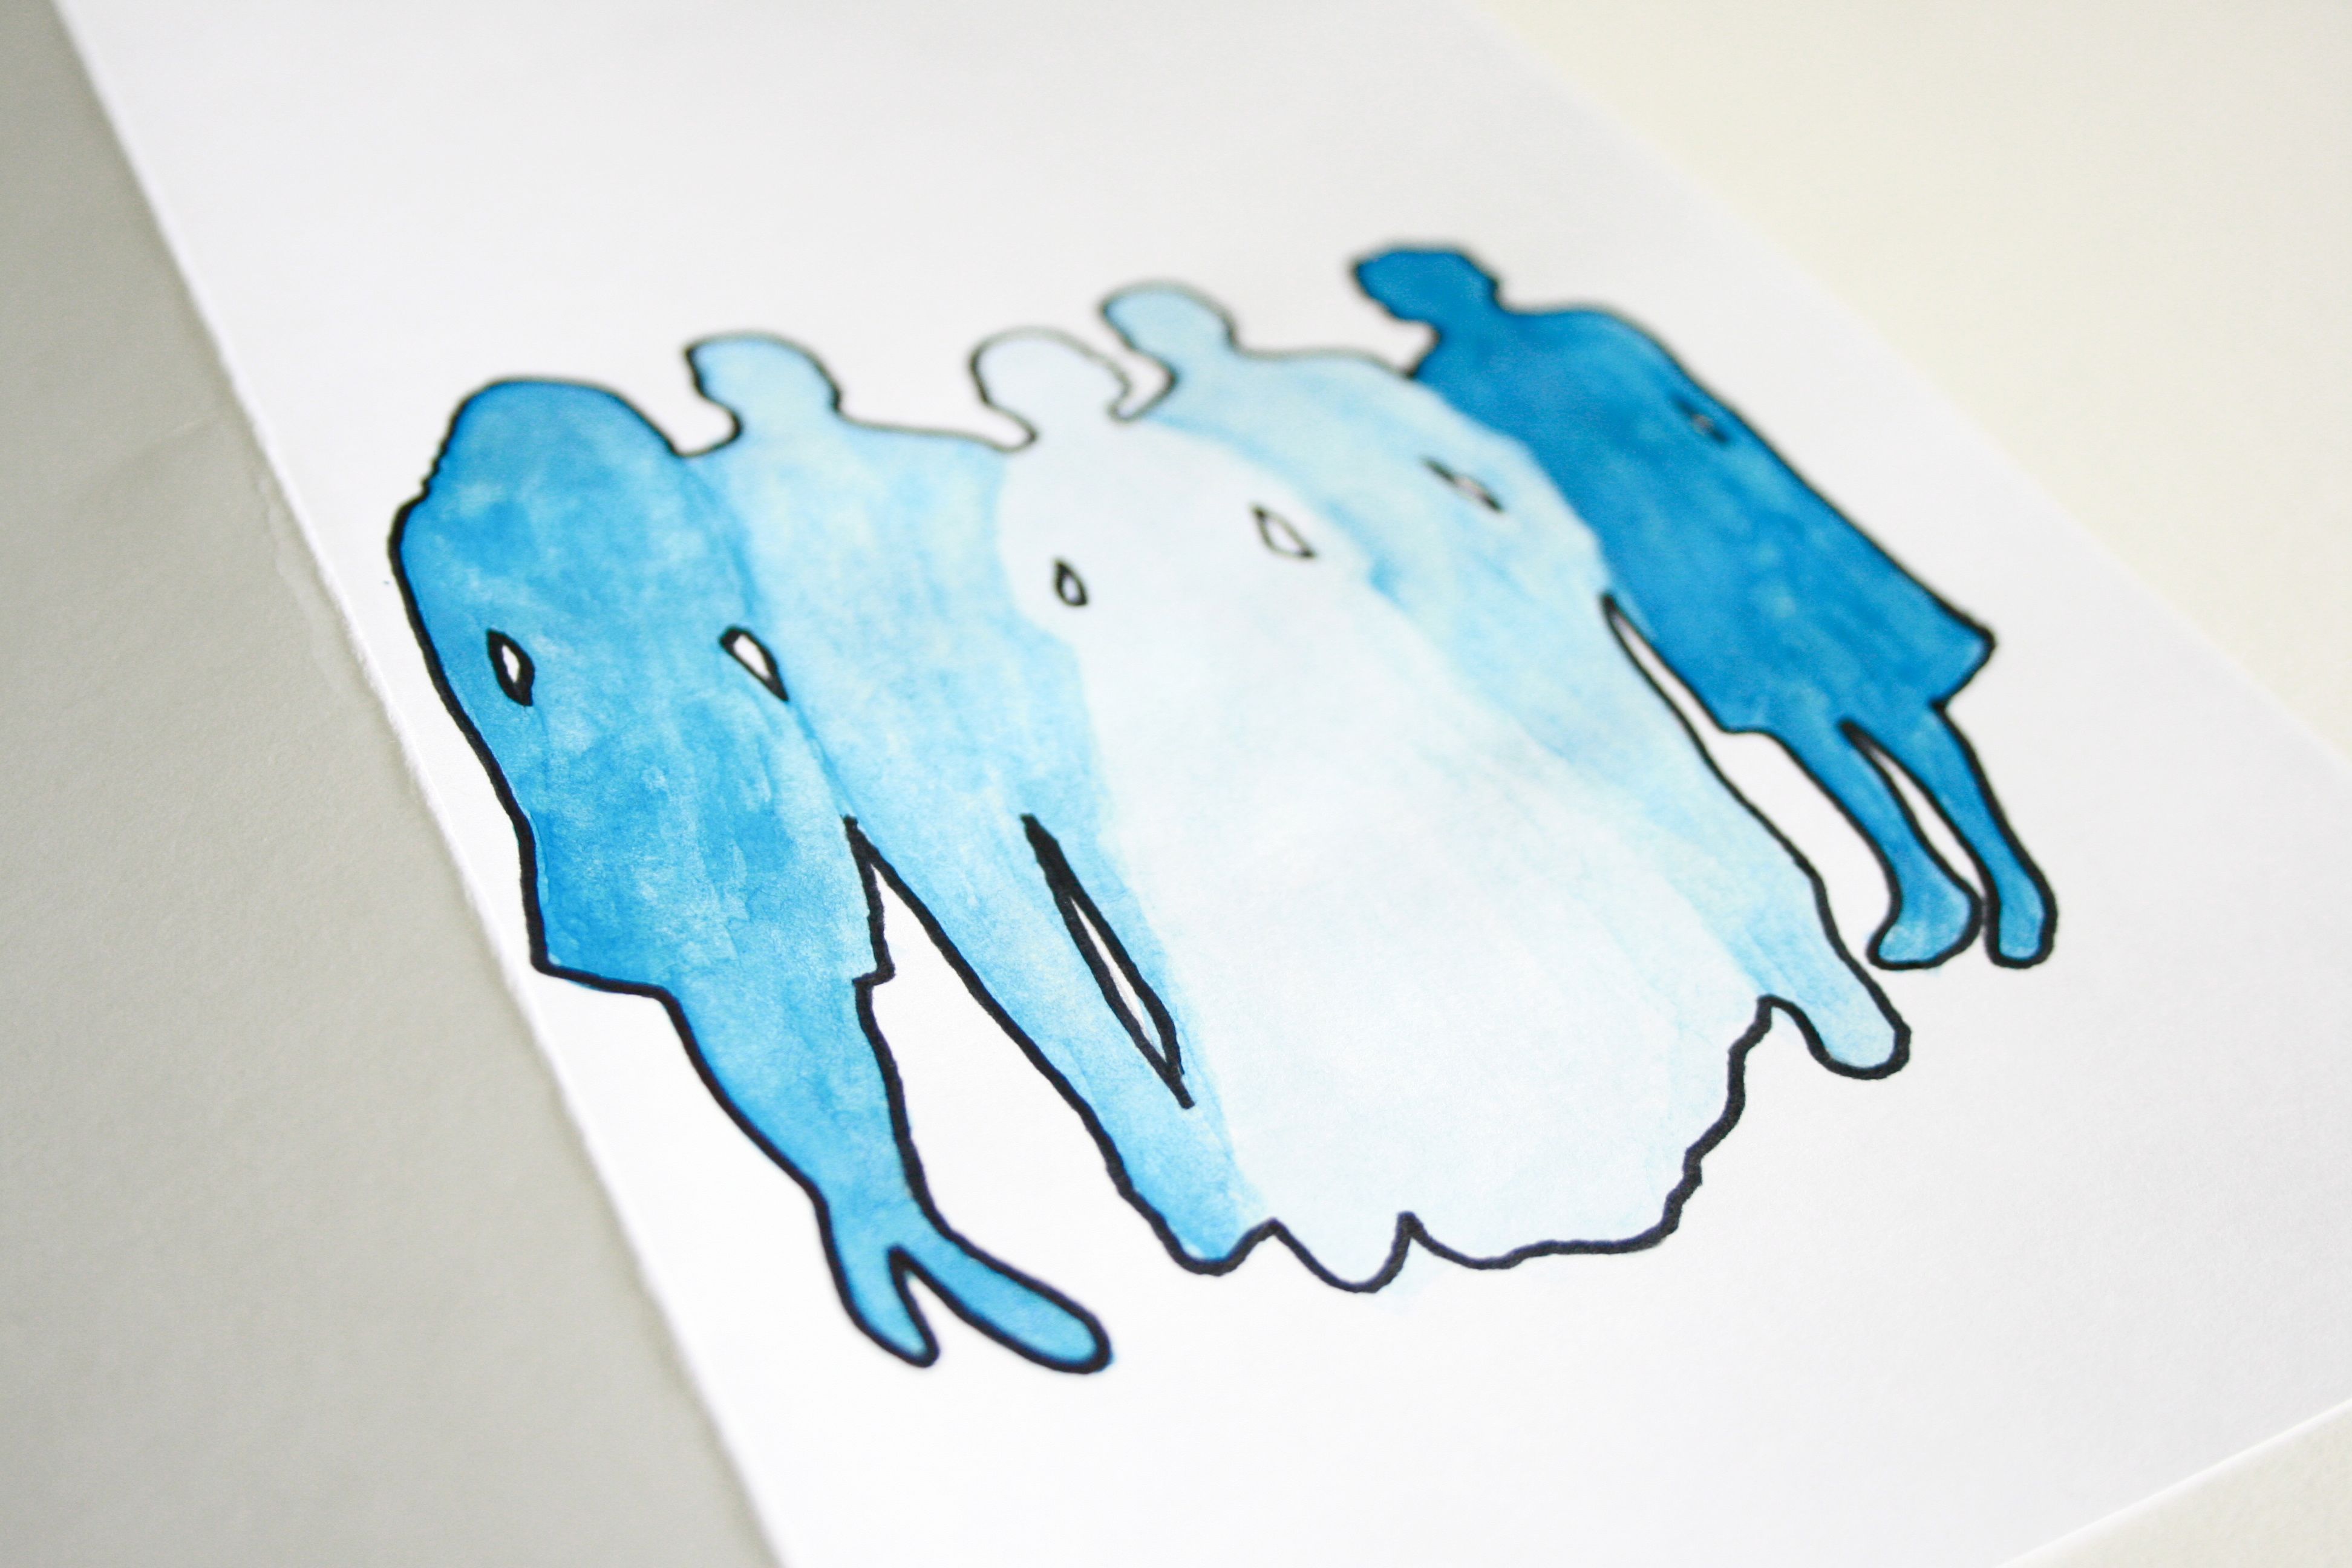
Next, grab your watercolor paints and pick a color. I went with a simple ombre effect in my mom’s favorite color – blue. I started by using an uneven ratio of paint on the outside figures (lots of pigment with a tiny bit of water), and added more water to the paint as I moved inward. Once each person was painted, I added a little bit more water to my brush to blend and blur the lines between each silhouette.

To make my silhouettes a little more pronounced and crisp, I waited until the paint was dry (about an hour) and then went back over the pencil lines with the black Sharpie marker.
After that, I added a simple “Happy Mother’s Day!” to the white space at the top of the card and dubbed it finished. My sister and I can’t wait to fill the inside of the handmade card with all the reasons why we love our mom!

In case I don’t get to tell everyone over the weekend, I wish you the happiest of Mother’s Days! –Carrie
The post DIY Mother’s Day Silhouette Card appeared first on Le Papier Blog.